
Category - Windows
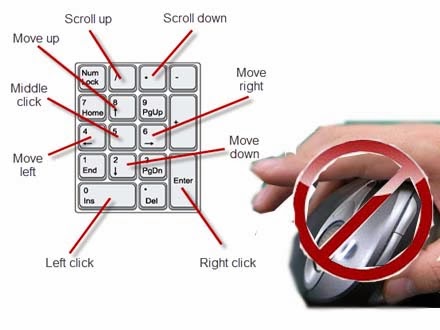
How to Use Keyboard As Mouse in Windows 7,8,Vista and XP?
Windows 10 : Some Useful Features Tips Tricks and Tweaks
How to Transform Windows 7 into Alienware? Make your PC Alienware

How to Download Microsoft .NET Framework offline installer for windows7/8/XP/Vista?